Ding, dong, your digital destiny awaits! The Hornbill T1 Video Doorbell has descended, perching upon porches and primed to protect your property with its piercing, prescient gaze. This technological talon, this feathered sentinel, stands ready to safeguard your sanctuary, welcoming visitors with a watchful eye and an array of innovative features. But how, you may ask, does one tame this tech-savvy avian? Fear not, intrepid homeowner, for we shall guide you through the step-by-step symphony of setting up this security-savvy staple, ensuring your abode remains an impenetrable aviary of peace and tranquility.

1. How to Use the App
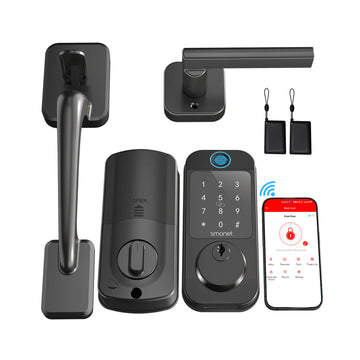
The T1 Video Smart Lock comes equipped with a sophisticated mobile application that enhances the user experience and elevates home security to a new level. To begin your journey with this innovative technology, follow these steps to seamlessly integrate the T1 Video Smart Lock with your smartphone.
- Create an Account
Initiate the process by downloading the JLink App and completing the registration using your email address or phone number. Once registered, proceed to log in to your account to unlock a world of possibilities.
- Pairing the Video Smart Lock to Smartphone
Navigate to the homepage of the JLink App and tap on the addition symbol to initiate the device pairing process. Ensure that your smartphone's Bluetooth functionality is enabled and connected to a 2.4GHz Wi-Fi network. Keep your phone within close proximity (10 feet) of the lock. Upon detecting the T1 Video Smart Lock, follow the on-screen prompts to establish a seamless connection.
- How to Adjust the Opening Direction
Initiate the automatic detection and adjustment of the unlock direction by selecting "Start Check" within the app. Follow the subsequent steps to refine this crucial aspect of your smart lock setup.
- Connecting the Lock to the Wi-Fi Network
Input the credentials of your 2.4GHz Wi-Fi network to synchronize your lock with the same network your phone is currently linked to. Confirm the connection by selecting "Connect" and finalize the setup by clicking on "Complete." Your T1 Video Smart Lock is now seamlessly integrated into your digital ecosystem.
- How to Share my Lock with my Family/Friends
Should you wish to extend the usage privileges of the doorbell cameras to your loved ones, leverage the app's feature set for sharing within the family or specific devices. Each sharing option offers unique benefits, allowing recipients to access either all devices within the household or a designated single device.
By following these steps, you can unlock the full potential of the T1 Video Smart Lock App and experience a new realm of convenience and security within your living space.

2. How to Integrate Smart Home System
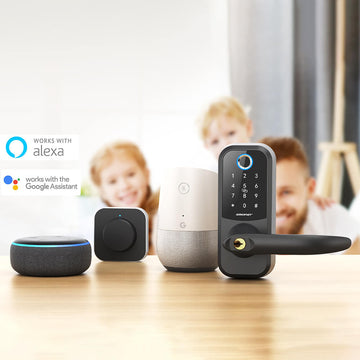
In this digital age, the integration of smart home systems has become increasingly popular, offering convenience and efficiency at your fingertips. Let's explore how you can seamlessly incorporate your T1 Video Smart Lock into two prominent smart home ecosystems: Amazon Alexa and Google Assistant/Home.
1) Amazon Alexa Integration
Step 1: Begin by downloading the Amazon Alexa App from either Google Play or the App Store. Launch the app and log in using your Amazon account credentials to kickstart the integration process.
Step 2: Within the JLink app, navigate to the "Me" section and select "Amazon Alexa." Proceed to log in to your Amazon account by following the on-screen instructions. Click on "Link" to establish the connection between JLink Home and Alexa successfully. Once the binding is confirmed, return to the previous screen.
Step 3: Open the Amazon Alexa app to locate your Video Smart Lock on the "Home" page. Select the "Locks" icon and access the settings by clicking on the upper right "Setting" icon. Enable features such as "Unlock by App" and "Enable Unlock," set up an access code, and confirm the settings to finalize the integration seamlessly.
2) Google Assistant/Home Integration
Step 1: Within the "Me" section of the JLink app, select "Google Assistant" and proceed to open Google Assistant.
Step 2: Follow the prompts to link your JLink account with Google Assistant, ensuring a seamless connection between the two platforms.
Step 3: Choose the specific device you wish to bind and click on "Bind." Grant the necessary permissions by clicking "Allow" and wait for the linking process to complete.
Step 4: Once the device is successfully added, select it and designate a room by clicking on "Add to a room."
Step 5: Organize your devices into respective rooms for easy access and management. Confirm the settings by clicking "Next" and adding the device to the designated room before clicking "Done."
Step 6: Navigate to the Devices page within Google Assistant/Home to locate and access your T1 Video Smart Lock seamlessly within the integrated ecosystem.
By following these steps, you can effortlessly integrate your T1 Video Smart Lock with Amazon Alexa and Google Assistant/Home, unlocking a new realm of smart home convenience and control at your fingertips.

3. How to Reset the Doorbell Camera
In the event that you need to reset your Hornbill T1 Video Smart Lock for any reason, follow these detailed instructions to restore it to its factory settings effortlessly.
1) Method 1
Step 1: Begin by illuminating the keypad on the lock. Carefully remove the battery from its compartment and wait for 5 seconds before reinserting it back into place.
Step 2: Long press the double locking button for 10 to 15 seconds to initiate the reset process.
Step 3: Upon hearing the prompt "Please input the initialization passcode," swiftly enter "000#" on the keypad.
Step 4: Once the lock confirms with the voice prompt "Deleting administrator successful," you can rest assured that the reset process has been completed successfully.
2) Method 2
Step 1: Start by uninstalling the back lock by removing the battery cover and extracting the battery from its compartment. Proceed to remove the screws securing the back lock in place.
Step 2: Reinstall the battery back into the compartment to prepare for the reset process.
Step 3: Locate the Reset Button (refer to the provided diagram) and hold it for 5 seconds. You will hear the prompt "Please input initialization passcode" from the lock.
Step 4: Input "000#" on the keypad after the prompt. Upon hearing the confirmation "Deleting administrator successful," you can be assured that the lock has been successfully reset to its default settings.
By following these step-by-step instructions, you can effectively reset your T1 Video Smart Lock with ease, ensuring smooth operation and security within your smart home environment.
4. Conclusion
In conclusion, the journey of setting up and integrating your Hornbill T1 Video Doorbell into your smart home ecosystem is a transformative experience, blending cutting-edge technology with seamless convenience and enhanced security. By following the detailed steps outlined in this guide, you have unlocked a realm of possibilities, from using the intuitive app to sharing access with loved ones, integrating with Amazon Alexa and Google Assistant/Home, and even resetting the lock effortlessly when needed.

